How Often Should You Clean Your Dryer Vent? A Homeowner's Safety Guide

Clean the dryer lint filter every load, check the visible vent system regularly, and clean the full dryer vent ductwork at least once a year -- more often if drying times increase or access requires a professional.
The lint screen is easy to see. The rest of the dryer exhaust system isn’t. That’s why a dryer can keep running while lint builds up farther down the vent path, airflow gets worse, and drying times slowly stretch out.
The U.S. Fire Administration identifies failure to clean as the leading factor contributing to ignition in home clothes-dryer fires in its 2018–2020 data, and recommends cleaning the lint filter every time you use the dryer and cleaning the dryer vent ductwork every year. CPSC adds that lint buildup in the dryer or exhaust duct can block airflow, create excessive heat, and contribute to a fire.
For a homeowner, the maintenance plan is straightforward: clean the lint filter every load, check the visible vent system regularly, and make annual vent-duct cleaning part of the home-maintenance calendar.
The short answer
USFA recommends:
- clean the lint filter every time the dryer is used;
- clean dryer vent ductwork every year;
- keep the area around the dryer clear;
- check that the venting behind the dryer is not damaged, crushed, or restricted;
- make sure the outdoor vent covering opens when the dryer runs.
CPSC adds an important symptom: if clothing is still damp after a normal cycle, or drying takes longer than usual, a blocked lint screen or exhaust duct may be part of the problem. A longer drying time isn’t proof of a clogged vent, but it’s a reason to inspect the airflow path rather than simply running the dryer longer.
The Dryer Is an Airflow System
A dryer does more than heat and tumble clothes: it has to move moist air out of the machine and through the exhaust duct to the outdoors, and lint interferes with that process. The filter catches a large amount of lint, but not all of it; some collects behind the dryer, in the transition duct, in longer duct runs, and at the exterior termination. CPSC explains the hazard clearly: lint buildup can restrict airflow, create excessive heat buildup, and in some dryers result in a fire. Cleaning only the lint screen is necessary, but it isn’t sufficient.
Every Load: Clean the Lint Filter
This is the highest-frequency dryer task. USFA and CPSC both recommend cleaning the lint filter before or after each load, and neither recommends running the dryer without the filter installed. The habit is simple:
- Remove the filter using the manufacturer’s normal procedure.
- Remove visible lint.
- Reinstall the filter correctly.
- Make sure the filter area is not damaged or obstructed.
If the screen is torn, damaged, or doesn’t fit properly, follow the manufacturer’s replacement guidance rather than improvising a filter.
Once a Year: Clean the Dryer Vent Ductwork
USFA recommends cleaning dryer vent ductwork every year: a clear maintenance anchor worth putting on the annual schedule. The exact cleaning method depends on the dryer, the duct length, the number of turns, the accessibility of the system, and whether the appliance is electric or gas. Some vent runs are short and accessible; others travel through walls, ceilings, crawlspaces, or roofs. The maintenance requirement is the same, but the safe DIY boundary isn’t.
If cleaning the full run requires moving a gas appliance, disconnecting a gas connector, opening inaccessible building cavities, climbing onto a roof, or working where you can’t verify the duct afterward, hire a qualified professional. The goal is a clear vent path, not proving that every homeowner can clean every vent configuration personally.
Check the Outdoor Vent While the Dryer Runs
USFA and CPSC both tell homeowners to verify that the exterior vent opens when the dryer is operating: one of the easiest airflow checks you can make. Stand outside while the dryer is running and look at the vent termination to confirm that the cover or flap can open and that exhaust air is actually leaving the home. If the flap barely moves, stays closed, or airflow seems absent, the exhaust path may be restricted. Don’t reach into a moving mechanical part or dismantle an exterior vent while the dryer is operating. Observe first, then decide what access is safe.
Longer Drying Time Is a Useful Clue
CPSC notes that clothes still being damp after a typical cycle, or drying taking longer than normal, may indicate a blocked lint screen or exhaust duct. That matters because homeowners often respond to slower drying by adding more time, which treats the symptom while ignoring the airflow question.
If drying time starts increasing:
- clean the lint filter;
- confirm the outdoor vent opens;
- inspect the accessible duct for obvious crushing or restriction;
- review when the full vent was last cleaned.
If those checks don’t explain the change, the appliance itself may need service. Not every slow dryer has a clogged vent, but a change in drying time deserves attention.
Inspect the Duct Behind the Dryer
USFA recommends checking the venting system behind the dryer to make sure it isn’t damaged, crushed, or restricted. CPSC recommends rigid or corrugated semi-rigid metal ducting rather than plastic or foil accordion-type material, noting that plastic or foil duct can trap lint more easily and is more susceptible to kinking or crushing.
None of that means you should automatically pull out the dryer and rebuild the vent connection. First inspect what’s safely visible. Look for:
- crushed duct;
- sharp kinks;
- disconnected sections;
- torn material;
- lint escaping around a connection;
- excessive slack that collapses behind the dryer.
If moving the dryer is necessary, consider the appliance type and connections first. A gas dryer introduces a gas connector that shouldn’t be stressed, twisted, disconnected, or repositioned casually. If you’re unsure what will move with the appliance, stop and use a qualified service person.
Clean Behind the Dryer
Lint can collect behind and around the appliance, and USFA and CPSC both recommend keeping this area clean and free of combustible clutter. Don’t store boxes, paper products, cleaning supplies, or piles of clothing against the dryer or exhaust path. If safe access requires moving the dryer, use the same judgment as with duct inspection: the maintenance target is lint and clutter, not appliance disassembly.
What About the Inside of the Dryer?
The dryer cabinet can also accumulate lint. CPSC recommends having a qualified service person periodically clean the interior of the dryer chassis to minimize lint accumulation, which draws a useful line for homeowners: cleaning the lint screen and accessible vent is routine maintenance, while opening the dryer cabinet is appliance service. Don’t turn an annual vent-cleaning reminder into an electrical, gas, or appliance-repair project unless you have the training and information to verify the work.
Dryer Vent Material Matters
CPSC’s safety guidance recommends replacing plastic or foil accordion-style ducting with rigid or corrugated semi-rigid metal duct, because rigid or semi-rigid metal is less prone to crushing and provides a smoother exhaust path than highly flexible plastic or foil material.
If your current dryer connection uses a material that doesn’t match the manufacturer’s installation requirements or current safety guidance, treat that as a correction project rather than simply cleaning it and forgetting it. Installation requirements can also be affected by the appliance and local code, and if the route or material needs to change substantially, a professional installation is often the cleaner decision.
A Dryer-Vent Maintenance Table
| What you find | What it means | What to do |
|---|---|---|
| Lint filter has visible lint after a load | Normal maintenance is due | Clean it before the next load |
| Dryer takes longer than usual | Airflow restriction is possible | Check lint screen, exterior vent, and accessible duct |
| Outdoor flap does not open | Exhaust flow may be restricted | Stop and inspect/clean the vent path |
| Duct is crushed or sharply kinked | Airflow is restricted | Correct the duct arrangement safely |
| Plastic or foil accordion duct is installed | CPSC identifies a safer metal alternative | Plan replacement with appropriate metal duct |
| Lint is collecting behind dryer | Housekeeping and airflow area need attention | Clean accessible lint and keep area clear |
| Full duct has not been cleaned in a year | USFA annual maintenance is due | Clean it or hire a vent-cleaning service |
| Vent exits through roof or inaccessible space | Safe access is limited | Hire a qualified professional |
| Gas dryer must be moved to reach connection | Gas connector may be stressed | Do not improvise; use qualified help |
| Dryer performance stays abnormal after vent cleaning | Vent may not be the only issue | Have appliance/system evaluated |
Do Not Use an Extension Cord for the Dryer
USFA advises that washers and dryers should be plugged directly into wall outlets. Major appliances shouldn’t be powered through extension cords, which can overheat and create a fire hazard. If the dryer can’t reach a proper receptacle, that’s an electrical-layout problem to correct, not a reason to add an extension cord; electrical modifications belong with a qualified electrician.
Clothes Contaminated With Flammable Substances Need Special Care
CPSC warns that clothing exposed to volatile chemicals or oils (gasoline, certain cleaning agents, finishing oils, stains, and cooking oils among them) can present additional fire risk. This isn’t ordinary laundry. Follow the appliance and product guidance for contaminated materials, and don’t assume that one wash cycle makes a heavily contaminated item safe for normal high-heat drying. If the material has been exposed to a flammable product, read the product’s handling instructions before using the dryer.
When to Stop Using the Dryer
Some signs should move the decision from maintenance to service. Stop using the dryer and investigate if you notice:
- burning smell;
- smoke;
- scorching;
- repeated overheating;
- damaged cord or plug;
- sparking;
- a vent path that is disconnected;
- no exhaust at the exterior termination;
- abnormal heat around the machine;
- gas odor around a gas dryer.
If you smell gas, don’t troubleshoot the dryer. Leave the area, follow the gas-emergency procedure for your utility or local emergency services, and don’t operate switches or devices in the affected area.
Build Dryer Maintenance Into the Home Calendar
A simple schedule covers most of the routine work:
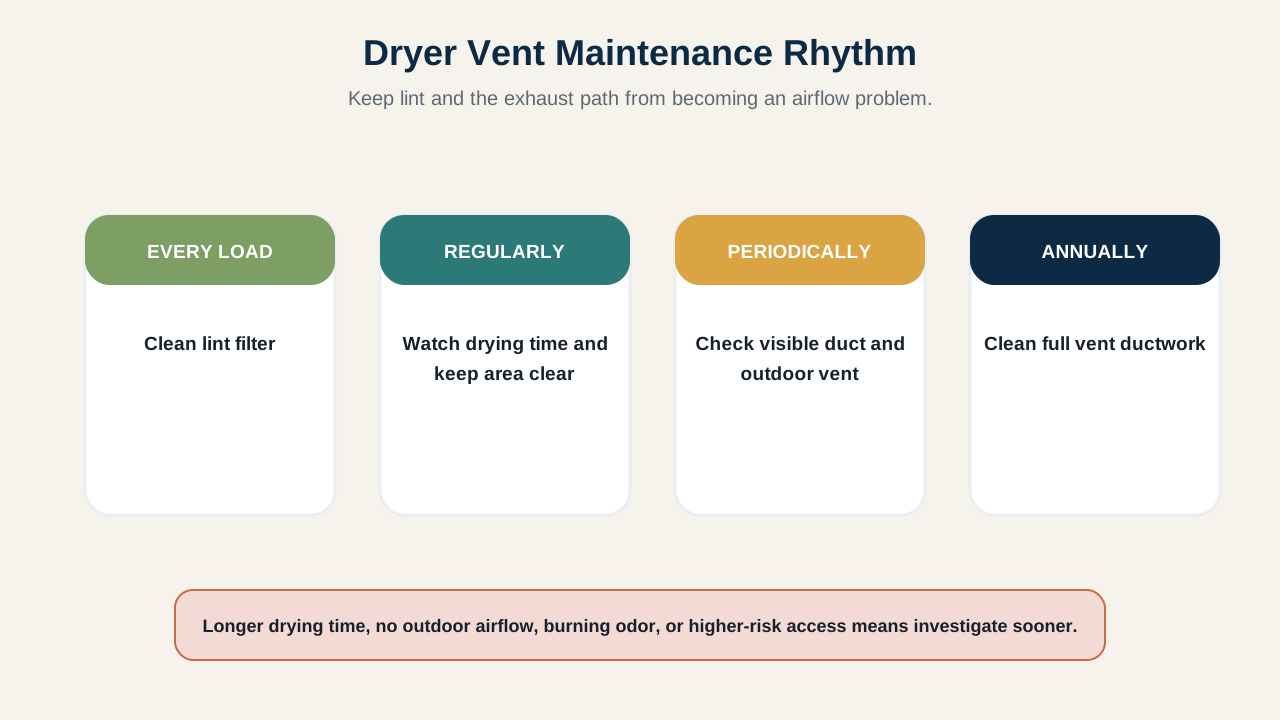
Every load: clean the lint filter.
Regularly: keep the dryer area clear and watch for longer drying times.
Periodically: look at accessible ducting for damage or crushing and confirm the outdoor vent operates.
Annually: clean the dryer vent ductwork.
The annual date doesn’t have to be perfect. Choose a month you can remember. If the dryer starts taking longer than normal before that date, inspect the system sooner. This is one part of the same first-time homeowner maintenance checklist rhythm that covers the rest of the house.
How This Fits the DIY-or-Hire Framework
A dryer vent is a good example of why the same maintenance task can be easy in one house and difficult in another. A short, accessible vent with a simple exterior termination may be easy to inspect; a long duct through a wall cavity and roof is not the same project. Ask:
- Can I access the full area safely?
- Will I need to move a gas appliance?
- Can I verify that the duct is reconnected correctly?
- Does roof access enter the job?
- Am I cleaning a vent, or opening the dryer itself?
The work changes category when the consequences of a mistake become harder to see or verify, which is exactly the judgment the DIY or hire a professional framework is built to walk through. If your home also depends on smoke and carbon monoxide alarms working correctly, the same know-your-limit-then-call-a-professional logic applies there too.
Keep the Air Path Clear
The dryer needs a clear path from the drum to the outdoors, and homeowner maintenance should protect that path without creating new hazards. Remember the sequence:
Lint filter every load → visible airflow checks → annual vent cleaning → professional service when access or appliance work exceeds routine maintenance
The dryer doesn’t need to look broken to have an airflow problem. A longer cycle, a vent flap that stops opening, or a duct that has gone years without cleaning is enough reason to look closer. A few minutes of routine maintenance is much easier than discovering the problem after overheating or a fire.
This vent-cleaning routine is one part of a larger home maintenance approach: notice when something changes, handle the low-risk maintenance yourself, and call a professional once the job goes past routine upkeep.
Sources and further reading
We prioritize primary and authoritative sources. The sources below support the factual and technical guidance used in this article.
Practical Homeownership provides general educational guidance. Home conditions, local rules, manufacturer requirements, and the appropriate professional scope can vary.