First-Time Homeowner Maintenance Checklist: What to Check, When, and What to Leave to a Pro

Use this first-time homeowner maintenance checklist to learn what to check in your first 30 days, what to maintain, and when to call a professional.
Buying your first home changes the way you notice things around the house. That drip under the kitchen sink, the faint stain spreading across a ceiling tile, an odd rattle from the HVAC unit: these used to be somebody else’s problem to report. Now they’re yours to catch early.
You don’t need to become a contractor to take care of a house well. What you actually need is more modest: know what you own, notice when something changes, handle the small stuff safely, and recognize the point where a job belongs to a professional instead of you.
The short answer
Spend your first month building a baseline: find and document the home’s major systems, check for visible water problems, confirm the smoke and CO alarms work, identify your HVAC equipment and filter size, locate the electrical panel and main water shutoff, record your water heater’s basic information, look at how water drains around the exterior, and find out whether the house has a recent, reliable radon test. If not, testing your home for radon is a straightforward way to get one.
Once that baseline exists, shift into a recurring rhythm instead of trying to inspect everything all the time. And keep the goal in view: you’re not trying to fix everything yourself. You’re learning to observe, maintain, and escalate.
- Observe: learn what normal looks and sounds like in your house.
- Maintain: handle the small, low-risk jobs you can do safely.
- Escalate: call a qualified professional once the risk, the diagnosis, or the repair goes past ordinary homeowner maintenance.
Your First 30 Days: Build a Baseline for Your Home
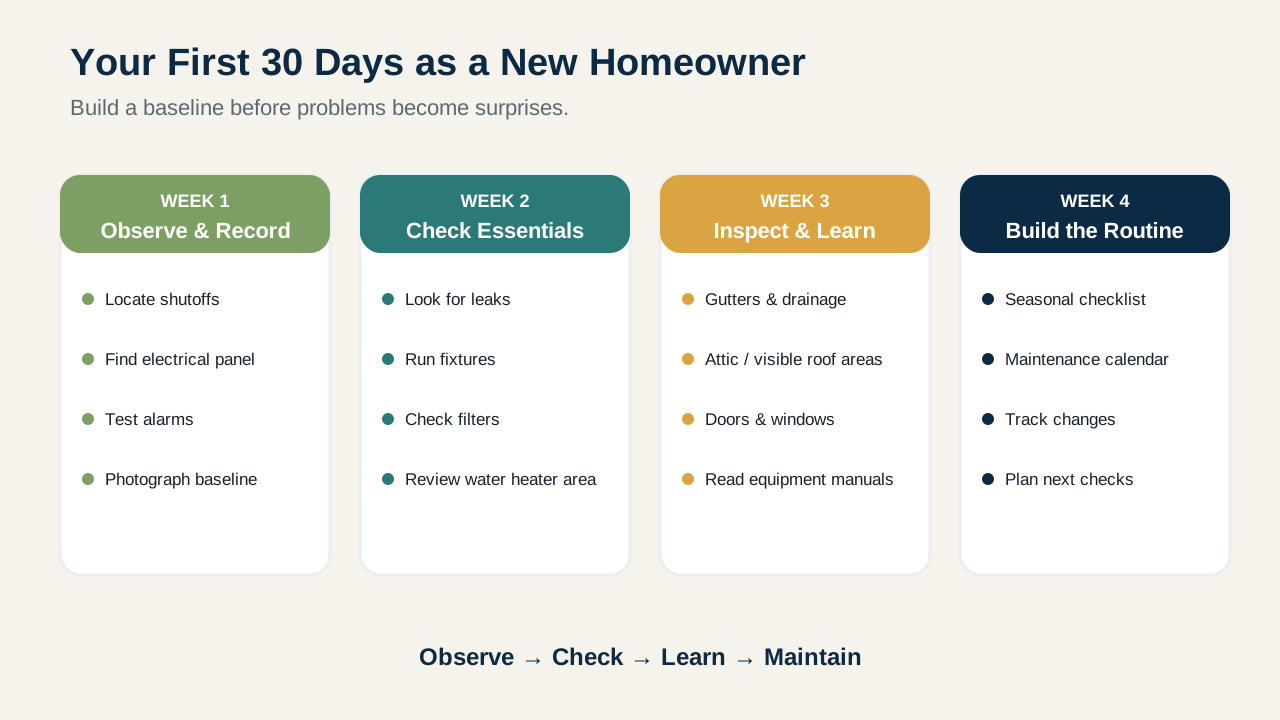
The first month matters because it’s the easiest time to learn a house, before small changes blend into the background. Treat it as building a reference point: take photos, save model numbers, track down manuals, write down whatever service dates you know, and keep inspection reports and repair records in one place. Together, that becomes your home’s maintenance history.
1. Find your main water shutoff
Know where the main shutoff is, and make sure you can actually reach it quickly, not just that you’ve seen it once.
A serious plumbing leak can dump a lot of water into your home before a plumber ever shows up, which makes finding this valve more useful in an emergency than knowing how to fix a pipe yourself. If the valve looks old, stiff, or unfamiliar, don’t assume it’ll turn smoothly when you need it to. Ask a plumber to check it now, while there’s no emergency forcing the question. A closer look at where the main water shutoff valve actually is and how to verify it works walks through this in more detail.
While you’re at it, find the smaller shutoffs under sinks and behind toilets too. They’re often the quickest way to stop a small, localized leak without shutting off water to the whole house.
2. Locate your electrical panel
Find the electrical service panel and make sure the area in front of it stays clear, not stacked with storage boxes or blocked by furniture.
Read through the existing circuit labels and note whether they’re accurate and complete, or whether half of them just say “misc.” That’s identification, not an invitation to go further: leave the panel cover on, and don’t alter wiring, swap breakers, or do any internal electrical work unless you’re qualified to do it.
Some signs are worth taking seriously rather than troubleshooting yourself: a burning smell, visible scorching, unusual heat, a breaker that keeps tripping, buzzing, damaged components, or water anywhere near electrical equipment. Any of those calls for an electrician, not experimentation.
3. Understand whether your home uses natural gas or another fuel
Figure out which major appliances run on electricity, natural gas, propane, oil, or something else, and save your gas utility or fuel provider’s contact information somewhere you can find it fast.
Gas-valve operation isn’t something to fold into routine homeowner maintenance. And if you ever suspect a gas leak, treat it as an emergency, full stop: CPSC guidance is explicit that if you smell gas or hear it leaking, you should leave your home immediately and contact local gas authorities from outside. Don’t flip a light switch, use a phone, or operate anything else electrical before you’re safely out.
4. Check your smoke and carbon monoxide alarms
An emergency is the worst possible time to discover that an alarm doesn’t work, so check them now, while it doesn’t matter yet.
The U.S. Consumer Product Safety Commission recommends smoke alarms on every level of the home, outside sleeping areas, and inside each bedroom, plus carbon monoxide alarms on every level and outside sleeping areas. Always follow the specific alarm manufacturer’s instructions and whatever your local code requires. For the full placement, testing, and replacement-age rules for both alarm types, see smoke and carbon monoxide alarms.
For your baseline, walk through and:
- Identify every smoke and CO alarm in the house.
- Test each one according to its instructions.
- Record manufacture or replacement dates where you can find them.
- Replace anything missing, expired, damaged, or malfunctioning.
- Note which alarms take replaceable batteries and which use sealed, long-life batteries.
These aren’t decorative. Treat them like the life-safety equipment they are.
5. Learn your HVAC system
Identify what actually heats and cools your house: the equipment manufacturer, model information, thermostat, return-air locations, and the air filter.
From there, figure out the filter size, whether it’s disposable or reusable, how it’s supposed to be installed, and whether any service records already exist.
ENERGY STAR recommends inspecting, cleaning, or changing central HVAC filters monthly, and having the equipment professionally checked before each heating or cooling season starts. That said, the right replacement interval depends on your specific filter, equipment, and household, not a one-size-fits-all number, so lean on the manufacturer’s instructions once you have them. See how often to change your HVAC filter for the full decision guide.
As a homeowner, your safe role here is inspecting an accessible filter and noticing when performance changes. Refrigerant work, internal electrical diagnosis, and combustion-system service are jobs for an HVAC professional.
6. Inspect for water before you worry about cosmetics
Water gets priority over almost everything else on this list, because a small visible sign can be the only warning you get of a much bigger problem underneath.
Walk the house and check under sinks, around toilets, around the water heater, near the dishwasher and washing machine, around any accessible plumbing connections, below windows, and along ceilings and walls. You’re looking for active dripping, damp materials, water stains, swollen or damaged finishes, musty odors, peeling or bubbling paint, rust or corrosion, recurring condensation, or moisture you can’t otherwise explain.
EPA guidance is consistent on this point: moisture control is the central strategy for controlling mold, and plumbing leaks and other water problems should be corrected promptly, with wet or damp materials dried out quickly after a leak or spill.
Painting over a stain or wiping away visible mold doesn’t solve anything if the moisture behind it is still there. Before doing either, ask where the water is actually coming from.
7. Establish a water-use baseline
If your home has its own accessible water meter, find it. Your water bill can double as a maintenance signal once you know what normal looks like.
EPA WaterSense recommends watching for unexplained jumps in water use, and offers a simple meter-based leak check: turn off all water in the house, then check whether the meter still moves over a two-hour period. If it does, there’s probably a leak worth investigating.
This is homeowner-level diagnosis at its best. You’re not opening walls or taking plumbing apart. You’re just noticing evidence that tells you where to look next.
8. Document your water heater
Record what you can find: fuel or energy source, manufacturer, model, approximate age if you can determine it, service history, the manual if one exists, and any visible corrosion or leakage.
A quick look around the unit, without taking anything apart, is enough to catch obvious water or deterioration.
Water heaters combine electricity or gas, combustion, pressure, and genuinely hot water, which is why EPA’s WaterSense guidance points to professional annual servicing as the best way to get every part of the system checked. If you do take on manufacturer-authorized maintenance yourself, follow that specific manual rather than generic advice from the internet.
9. Check how water moves around the outside of the house
Rainwater shouldn’t be routinely pooling against your foundation.
From ground level, take a look at the gutters, downspouts, and wherever those downspouts discharge, along with the ground near the foundation, any persistent puddling, obvious drainage or exterior deterioration, and signs of water getting into a basement or crawlspace.
EPA moisture guidance recommends keeping roof gutters maintained and grading the ground so it slopes away from the foundation, so water doesn’t collect around the building in the first place.
You don’t need to get on a roof for a useful first pass. A lot can be learned from the ground, from windows, and from what shows up inside after it rains. If a closer look would mean climbing somewhere unsafe, that’s a job for a professional.
10. Look at the attic, basement, and crawlspace (if they’re safely accessible)
These spaces tend to show problems that finished rooms hide behind drywall and paint: water intrusion, condensation, musty conditions, damaged materials, pest activity, unusual staining, plumbing leaks, general deterioration.
Skip any space that looks structurally unsafe, contaminated, dangerously hot, hard to get out of, or hazardous in some other way, and don’t disturb anything you suspect might contain asbestos. You don’t need to touch a problem to know it needs professional evaluation. Seeing it is enough.
11. Check your clothes dryer setup
A dryer is easy to overlook because it just works, right up until it doesn’t.
Clean the lint filter every time you use it, and pay attention if clothes start taking noticeably longer to dry than they used to. The U.S. Fire Administration recommends cleaning the lint filter every time the dryer is used and cleaning the dryer vent ductwork every year, and identifies failure to clean as a leading contributor to residential clothes-dryer fires. For the full cleaning rhythm and warning signs, see how often to clean your dryer vent.
If the vent route is hard to reach or would require taking things apart beyond basic homeowner maintenance, bring in a qualified service provider instead.
12. Check your radon history
Radon has no smell and no visible presence. The only way to know it’s there is to test for it.
If you don’t have a reliable, recent radon result for your home, add testing to your baseline now. EPA guidance recommends testing as soon as possible if a home hasn’t been tested, recommends action when results come back at 4 pCi/L or higher, and notes that even lower levels carry some risk.
And don’t assume new construction is automatically safe here. EPA guidance specifically calls for testing newly built homes after occupancy too.
Your Recurring Home Maintenance Checklist
Once you actually know the house, maintenance gets a lot easier. Instead of re-inspecting everything constantly, settle into a rhythm.
Every month or so
Test smoke and CO alarms. Test monthly and follow the manufacturer’s instructions for battery and unit replacement.
Check the HVAC filter. Take a look monthly, and clean or replace it whenever that’s appropriate for your specific system and filter.
Look for new water problems. This doesn’t need to be a formal inspection every few weeks, just a habit of glancing at the places water problems tend to show up first: under sinks, around toilets, around appliances, near the water heater, on ceilings, around windows, and in basements or anywhere that’s been damp before. A stain matters a lot more once you know it wasn’t there last month.
Watch your utility use. An unexpected jump in water or energy use doesn’t prove something’s wrong, but it’s a good reason to go investigate. A lot of maintenance comes down to noticing that something changed before you know why.
Seasonally
Seasonal maintenance should follow your climate, not a generic national calendar. A homeowner in Minnesota deals with freeze risks a homeowner in South Florida may never see, and a desert climate, a coastal environment, heavy-snow country, hurricane season, and humid subtropical weather all push different priorities to the top of the list.
Use each change of season as a reminder to check whatever system is about to get worked harder. Depending on your home and climate, that might mean heating or cooling prep, gutters and drainage, exterior water management, irrigation, freeze protection, storm prep, window and door condition, or obvious exterior wear.
If your HVAC system is heading into a heavy season, ENERGY STAR recommends getting it professionally serviced beforehand.
Once a Year or Periodically
Some maintenance genuinely only needs to happen once a year, or every so often.
Get appropriate HVAC maintenance done. A professional visit can catch things a filter inspection never will: electrical components, condensate drainage, refrigerant systems, combustion, and overall equipment operation.
Clean the dryer vent system. The U.S. Fire Administration recommends cleaning the dryer vent ductwork annually.
Check toilets for silent leaks. EPA WaterSense recommends checking for silent toilet leaks at least once a year. One common method: put a little food coloring in the tank and see if color shows up in the bowl without flushing.
Review your water heater. Check for leakage, corrosion, changes in performance, and anything that needs servicing. Follow the manufacturer’s schedule for your specific unit, and lean toward professional servicing when gas, electrical components, pressure controls, or hot-water hazards are involved. EPA WaterSense notes that annual professional servicing may be the best way to get the whole system checked properly.
Review your home’s maintenance record. Update whatever you’ve collected: repairs, contractor visits, equipment service, filter information, appliance replacements, leak history, photos, receipts, warranties, manuals. It’s easy to treat this as the boring part of homeownership, but a few years in, it tends to be the single most useful thing you have when something goes wrong or you’re ready to sell.
Learn the Difference Between a Maintenance Task and a Warning Sign
A good homeowner checklist shouldn’t just tell you what to do. It should help you figure out what you’re actually looking at.
| What you notice | What to do next |
|---|---|
| Dirty accessible HVAC filter | Clean or replace it per the equipment/filter instructions (routine maintenance) |
| Small faucet drip | Investigate the fixture yourself, or call a plumber if it’s beyond your comfort level |
| New ceiling water stain | Find the moisture source (or get it professionally diagnosed) before any cosmetic fix |
| Persistent window condensation | Look into humidity, ventilation, temperature, and possible moisture sources; see condensation or a possible leak |
| Breaker repeatedly trips | Stop resetting it and get the cause evaluated |
| Burning smell or scorching near electrical equipment | Treat as a safety issue; call a qualified electrician |
| Gas odor | Leave the area and follow emergency/utility guidance |
| Roof damage visible from the ground | Arrange a closer professional inspection if it requires getting on the roof |
| Extensive or recurring mold growth | Address the moisture source and consider professional evaluation or remediation |
| HVAC stops cooling and refrigerant work may be involved | Call an HVAC professional |
| Elevated radon result | Follow EPA guidance and consult a qualified radon professional if mitigation is indicated |
The distinctions matter here. Maintenance isn’t the same thing as repair, repair isn’t the same thing as diagnosis, and noticing a problem isn’t permission to start taking a system apart.
Water Problems Deserve Faster Attention Than Cosmetic Problems
Not every home defect carries the same urgency. A loose cabinet handle and a spreading ceiling stain shouldn’t be competing for your attention on equal terms. A rough way to prioritize, by consequence:
- Immediate life safety
- Active water intrusion or major leakage
- Electrical, combustion, gas, or structural warning signs
- Conditions actively damaging the building
- System performance problems
- Routine preventive maintenance
- Cosmetic issues
None of this means every water spot is a catastrophe waiting to happen. It just means water is worth understanding before you decide to ignore it, and EPA guidance keeps coming back to the same point: moisture control is the central strategy for preventing indoor mold growth.
What This Checklist Won’t Teach You (On Purpose)
Owning a home doesn’t turn every repair into a DIY project, and a first-time homeowner checklist is the wrong place to learn how to work inside an energized electrical panel, modify household wiring, repair gas lines, diagnose combustion equipment internally, handle refrigerants, disturb suspected asbestos-containing materials, take on major structural modifications, attempt extensive mold remediation, do dangerous roof work, or run complicated plumbing repairs where a mistake could cause serious damage.
Each of those requires its own training, equipment, licensing, code knowledge, or professional judgment. Knowing when not to proceed is part of what makes someone a capable homeowner, not a weakness in one. For a closer look at how to weigh a specific repair against these limits, see DIY or hire a professional?.
Don’t Follow Maintenance Rules Blindly
You’ll run into plenty of home-maintenance calendars online: do this every three months, replace that every six months, flush something else every year, clean this every spring, spend some fixed percentage of your home’s value on upkeep annually. Some of those are useful reminders. Others are oversimplifications dressed up as rules.
Your actual schedule depends on manufacturer instructions, equipment design, climate, water quality, household occupancy, pets, local conditions, building age, previous repairs, how hard something gets used, and local code. Whenever specific manufacturer guidance exists for a piece of equipment, keep it with your maintenance records and follow that instead of a generic number. Let your house set the schedule, not a calendar someone else wrote for a different house.
The Simple First-Time Homeowner Checklist
If this article feels like a lot, start here.
First 30 days
- Locate the main water shutoff.
- Locate the electrical panel and keep access clear.
- Identify gas/fuel systems and save emergency utility information.
- Identify and test smoke and CO alarms.
- Identify HVAC equipment and the correct filter.
- Record water-heater information.
- Look throughout the home for leaks and moisture.
- Check gutters, downspouts, drainage, and the foundation area from a safe location.
- Inspect safely accessible attic, basement, or crawlspace areas for obvious problems.
- Check the dryer lint and vent setup.
- Confirm whether you have a reliable radon test.
- Start a home maintenance record.
Monthly / regularly
- Test smoke and CO alarms.
- Inspect the HVAC filter.
- Watch for new leaks, stains, odors, or condensation.
- Pay attention to unusual water or energy use.
- Note changes in how major equipment sounds or performs.
Seasonally
- Review HVAC needs before periods of heavy use.
- Check exterior drainage and gutters as conditions require.
- Look for weather-related exterior damage.
- Prepare irrigation, plumbing, or exterior systems for freezing weather where applicable.
- Adjust the checklist for your local climate.
Annually / periodically
- Arrange appropriate professional HVAC maintenance.
- Clean the dryer vent ductwork.
- Check toilets for silent leaks.
- Review water-heater maintenance requirements.
- Review major equipment manuals and service histories.
- Update your maintenance records.
You Don’t Need to Know Everything About Your House
Good homeownership isn’t about turning yourself into an electrician, plumber, roofer, HVAC technician, carpenter, and building inspector all at once. It’s about getting familiar with the house you actually live in: knowing where the important systems are, recognizing what normal looks and sounds like, and noticing when something changes.
Handle the simple stuff safely. And when the evidence points past what you know, or the cost of being wrong gets serious, bring in someone qualified. That’s not failing at DIY. That’s just good home maintenance.
This checklist is one part of a larger home maintenance approach: observe what’s normal, maintain what’s safe to maintain yourself, and escalate to a professional once a task goes past ordinary homeowner maintenance.
Sources and further reading
We prioritize primary and authoritative sources. The sources below support the factual and technical guidance used in this article.
- U.S. Consumer Product Safety Commission: Fire Safety
- U.S. Consumer Product Safety Commission: Carbon Monoxide
- U.S. Consumer Product Safety Commission: CPSC Issues Winter Weather Safety Tips to Prevent Fires and Carbon Monoxide Poisoning
- ENERGY STAR: Maintenance Checklist
- U.S. Environmental Protection Agency, WaterSense: Home Maintenance
- U.S. Environmental Protection Agency: A Brief Guide to Mold, Moisture and Your Home
- U.S. Environmental Protection Agency: How to Protect Your Family from Radon When Buying a Newly Built Home
- U.S. Fire Administration (FEMA): Basement and Garage Fire Safety
Practical Homeownership provides general educational guidance. Home conditions, local rules, manufacturer requirements, and the appropriate professional scope can vary.