How Much Attic Insulation Do You Need? How to Check Before You Add More

Look across the attic floor -- if insulation is level with or below the floor joists, you likely need more; measure depth in several safe spots, estimate R-value at roughly R-3 to R-3.5 per inch depending on material, and compare that estimate against current climate-zone guidance before adding anything, addressing air leaks, moisture, or unsafe wiring first.
You can look into an attic, see insulation covering the floor, and still not have a real answer to whether it’s enough. What matters isn’t just whether insulation is present. It’s whether it’s deep enough, evenly spread, dry, safe to get close to, and appropriate for your climate.
ENERGY STAR’s own screening test is a good starting point: if you can look across the attic and the insulation sits level with or below the floor joists, you probably need more. If the joists have disappeared under an even layer of insulation, you likely already have enough.
From there, the real question becomes R-value, and how your attic compares with what your climate actually calls for.
The short answer
Start at the attic access point before deciding whether to buy anything.
Look across the attic floor from a safe position, and note whether the joists are exposed, just covered, or buried well below the insulation. Check whether coverage is even or has obvious low spots. If you can reach several safe, accessible locations without disturbing anything you’re unsure about, measure the depth in each one. Identify the insulation type before converting that depth into an estimated R-value, then compare the result against current ENERGY STAR and DOE climate guidance.
Stop the DIY inspection if you see vermiculite, wet insulation, mold or rot, unsafe wiring, damaged framing, or an attic that isn’t safe to enter in the first place.
ENERGY STAR notes that common insulation types such as fiberglass, cellulose, and mineral wool are often roughly R-3 to R-3.5 per inch as a quick estimate, useful for figuring out whether you’re in the right range, not as a substitute for manufacturer data when exact performance matters.
What R-Value Actually Means
R-value measures resistance to heat flow. A higher number generally means the insulation resists heat moving through it more effectively.
That doesn’t mean every attic needs the same number. Recommended levels vary by climate, by what’s already up there, and by the assembly of the roof and ceiling itself. DOE publishes insulation guidance by climate zone, and ENERGY STAR points homeowners toward recommended attic R-values for their location, which is why a general article shouldn’t just tell you “your attic needs R-38” and leave it there.
Older ENERGY STAR guidance often used R-38 as a common reference point, but current recommendations can run higher depending on your climate and existing conditions. Use your location and the current guidance rather than one number that’s supposed to apply everywhere.
First: Decide Whether the Attic Is Safe to Inspect
An attic isn’t automatically a safe place to poke around. ENERGY STAR warns about sharp roofing nails, exposed ceiling drywall that won’t support your weight, electrical hazards, and difficult access, and its DIY inspection guidance recommends basic protective equipment: a flashlight, gloves, eye protection, and appropriate respiratory protection for dusty work.
More importantly, ENERGY STAR tells homeowners when to stop and bring in a professional instead of continuing a routine inspection. That includes wet or damp insulation, moldy or rotted rafters or floor joists, bathroom, kitchen, or dryer vents exhausting into the attic instead of outside, little or no attic ventilation where it should exist, knob-and-tube wiring, many unsealed or uninsulated recessed lights that would need special treatment, and any access that isn’t genuinely safe.
If you can’t get in and look around without stepping on exposed ceiling drywall, balancing awkwardly between framing members, or disturbing material you’re not sure about, don’t treat the attic as a routine DIY space. Walk only on the joists or truss chords themselves.
Vermiculite Changes the Plan Immediately
If you find vermiculite insulation, the inspection changes right away. EPA guidance says to assume vermiculite insulation may be contaminated with asbestos and to leave it undisturbed. Vermiculite attic insulation is usually described as a loose, pebble-like material that can appear gray-brown, silver-gold, or similar depending on the product, and you generally can’t rule out asbestos just by looking at it.
Don’t scoop it, rake it, move it aside to measure what’s underneath, or vacuum it. If removal turns out to be necessary, EPA’s current guidance says that work should go to a trained and accredited asbestos-abatement contractor, not a homeowner project.
If the material looks like vermiculite and you’re not certain what you’re looking at, stop the DIY inspection before disturbing it. A more precise depth measurement isn’t worth a possible asbestos exposure.
The Quick Visual Check
ENERGY STAR’s first screening step is simple: look across the attic floor. If insulation sits level with or below the floor joists, you probably need more. If it covers the joists well and is spread evenly, you may already have enough.
This is a screening test, not a measurement. It won’t give you an exact R-value, but it separates obviously shallow insulation from coverage that’s probably adequate. While you’re looking, check for uneven distribution too. An attic can have plenty of insulation in the center and much less near the eaves, or in spots where material got moved during earlier work.
Measure Depth in More Than One Place
If the attic is safe to access and you can reach the insulation without disturbing anything questionable, measure the depth in several places rather than assuming the area near the hatch represents the whole attic.
Record the insulation type, the depth at each location, any low spots, compressed areas, spots where joists are still exposed, and places disturbed by storage or previous work. Compression matters here: insulation flattened under boxes, boards, or foot traffic won’t perform the way the same material does at its intended thickness.
Convert Depth Into an Estimated R-Value Carefully
ENERGY STAR notes that many common attic insulation types (fiberglass, cellulose, and mineral wool) are often around R-3 to R-3.5 per inch for a quick estimate. That’s useful for screening whether you’re obviously short of the recommended range. It’s not a product specification, since different products perform differently.
If labels, installer records, or manufacturer data are available, use those instead of a generic per-inch estimate. A homeowner measurement should answer “am I clearly short of what’s recommended,” not pretend to be a lab result.
Compare With Your Climate Zone
DOE publishes recommended insulation levels by climate zone. Warmer zones generally call for less attic insulation than colder ones, and colder climates often call for substantially more.
When you compare your attic against that guidance, keep three things separate: your current estimated R-value, the recommended target range for your climate, and whatever your local building code actually requires. These aren’t always the same number: energy recommendations can exceed the code minimum that applied when the house was built, and codes change over time. If a renovation would trigger code requirements, check the current local rules rather than assuming the energy-efficiency target is also the legal minimum.
Air Sealing Comes Before “Just Add More”
ENERGY STAR consistently pairs attic insulation with air sealing, and for good reason. Insulation slows heat flow, but air leaks can move conditioned air directly through gaps in the building envelope, and piling more insulation on top of a major leak doesn’t fix the leak underneath it.
If you notice signs of air leakage, have ongoing comfort problems, or are planning a substantial insulation upgrade, it’s worth asking whether air sealing should happen first. A professional home-energy assessment can help when the leak path isn’t obvious. The same logic applies to smaller, more visible leaks. Finding air leaks around windows and doors covers the same “find it before you seal it” approach at a more everyday scale.
Dirty Insulation Can Be Evidence of Air Movement
ENERGY STAR notes that darkened or dirty insulation can indicate air moving through it and filtering household dust as it goes. That doesn’t automatically mean the insulation needs to be removed. The staining is more useful as a clue that points toward an air-leak path worth investigating.
If the area is also wet, moldy, or damaged by pests, you’re looking at a different and more serious problem than ordinary air movement, and it needs more than air sealing to fix.
Wet Insulation Is Not an “Add More” Problem
If insulation is wet or damp, set the R-value question aside for a moment. ENERGY STAR tells homeowners to address roof leaks and moisture problems before doing any attic insulation work.
Look for roof staining, wet sheathing, damp insulation, water marks near penetrations, or exhaust ducts that terminate in the attic instead of venting outside. Don’t bury the evidence under new insulation. Find and correct the moisture source first.
Recessed Lights, Wiring, and Ventilation Paths Matter
Electrical and ventilation details can change how insulation should be handled. Older recessed fixtures may not be rated for direct insulation contact, knob-and-tube wiring raises its own concerns, and many vented attics depend on a clear path from soffit to ridge (or another designed route) to work correctly.
Don’t pile insulation around electrical components just to hit a target depth, and don’t block a ventilation path that the attic was designed to rely on. If you can’t tell what clearance is required or what type of attic assembly you’re looking at, stop and get qualified guidance before proceeding.
A Practical Attic-Insulation Decision Table
| What you find | What it suggests | What to do next |
|---|---|---|
| Insulation level with or below joists | More is probably needed | Measure depth and compare with climate guidance |
| Joists fully covered and insulation even | Existing level may already be close to adequate | Estimate R-value before adding more |
| Large low spots | Coverage is uneven | Figure out why material moved or is missing |
| Vermiculite-like insulation | Possible asbestos-contaminated material | Do not disturb it; follow EPA guidance |
| Wet or damp insulation | An active or recent moisture problem | Find the source before adding insulation |
| Darkened insulation near penetrations | Possible air leakage | Evaluate air sealing before adding more |
| Knob-and-tube wiring or unclear electrical conditions | Insulation work could create electrical or fire risk | Get qualified professional guidance |
| Recessed lights with unknown rating | Clearance rules are unclear | Don’t cover them until the rating is verified |
| Safe attic but unclear target R-value | Climate or local guidance needs to be resolved | Use DOE/ENERGY STAR guidance and check local requirements |
| Attic is difficult or unsafe to enter | DIY measurement creates fall or injury risk | Hire a home-energy or insulation professional |
What If You Have a Finished Attic or Cathedral Ceiling?
Not every roof has an accessible attic floor. A cathedral ceiling or finished attic can hide insulation behind drywall or roof-deck assemblies where you simply can’t see it. ENERGY STAR recommends professional evaluation when insulation can’t be safely inspected from an accessible attic space. Don’t cut exploratory holes just to check insulation unless the project already justifies that kind of invasive work.
When an Energy Audit Adds Value
If the real question is bigger than “is my attic insulation shallow,” a home-energy assessment may be the better next step. Professional diagnostics can include attic inspection, blower-door testing, infrared imaging, and air-leak investigation: tools that are especially useful before an expensive insulation project, so you know whether the attic is actually the main problem, whether air sealing should come first, and whether moisture or safety issues need to be corrected before any insulation goes in.
If the problem is really concentrated in one specific room rather than spread across the whole attic, it’s worth reading why one room runs hotter or colder than the rest alongside this guide. Shallow insulation above a single room can produce exactly that kind of localized comfort problem, and the two checks work well together.
Build an Attic Baseline
If you’re a first-time homeowner, document the attic before anyone starts moving insulation around. Record the insulation type, approximate depth in several locations, how visible the joists are, any low spots, signs of air leakage, moisture staining, the ventilation setup, known electrical concerns, and photos taken from safe access points. This baseline fits naturally into a broader first-time homeowner maintenance checklist. Keep invoices and product documentation if insulation is added later.
Measure Before You Buy More
The right question isn’t “how many inches should I add.” It’s: what do I actually have, what does my climate call for, and is the attic ready for more insulation in the first place?
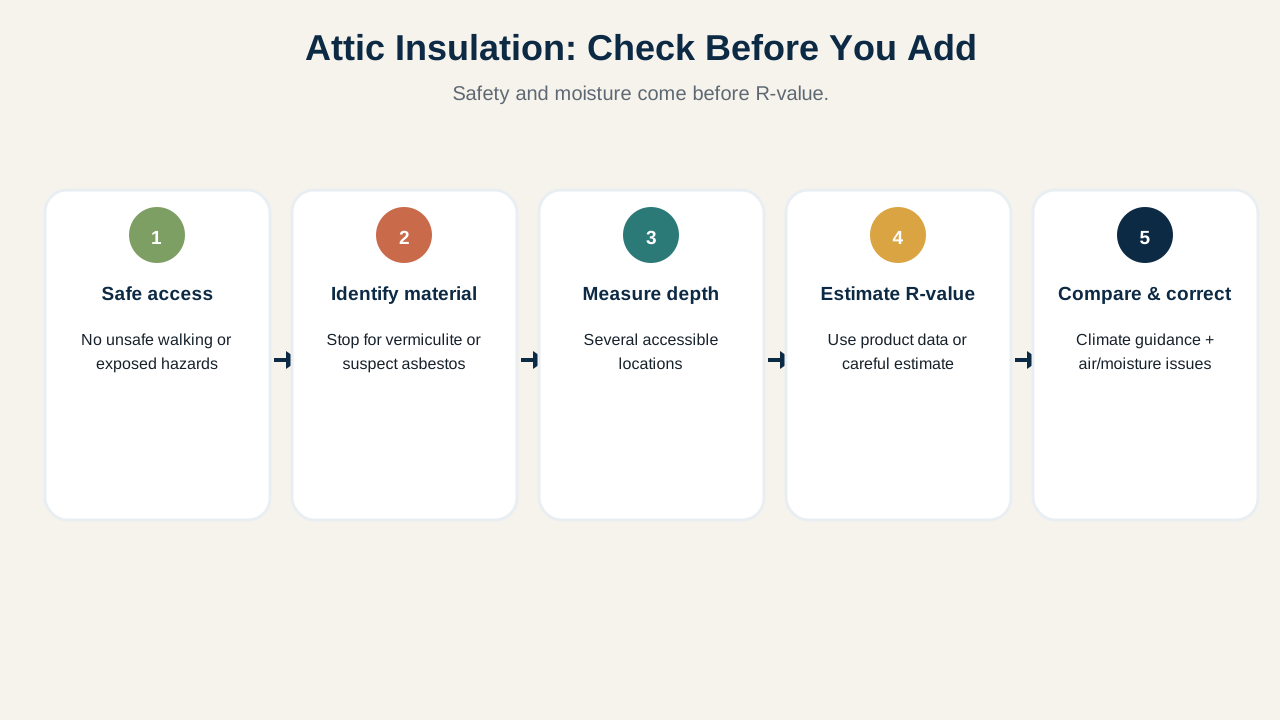
Use the sequence: safe inspection, identify the material, measure depth, estimate R-value, compare with climate guidance, address air and moisture and safety issues, then add insulation if it’s actually justified.
If you find vermiculite, wet materials, unsafe wiring, inaccessible areas, or anything else you can’t verify yourself, stop the DIY path there. That’s exactly the kind of judgment call our DIY or hire a professional guide walks through in more detail. This kind of attic check is one part of a broader energy and comfort approach to the house. A bag of insulation is inexpensive compared with burying a problem you should have found first.
If the attic is only one of several comfort problems in the house, when to get a home energy audit can help you decide whether it’s time for whole-house diagnostics instead of one project at a time. And if the insulation work grows into something more involved (new baffles, added ventilation, or structural changes), checking whether your repair needs a permit is worth a quick look before you start.
Sources and further reading
We prioritize primary and authoritative sources. The sources below support the factual and technical guidance used in this article.
- ENERGY STAR: What to Look For: DIY Checks and Inspections
- ENERGY STAR: Adding Attic Insulation
- ENERGY STAR: Attic Insulation Project
- U.S. Department of Energy: Consumer Guide to Home Insulation Fact Sheet
- U.S. Environmental Protection Agency: Protect Your Family from Asbestos-Contaminated Vermiculite Insulation
Practical Homeownership provides general educational guidance. Home conditions, local rules, manufacturer requirements, and the appropriate professional scope can vary.