How to Find Air Leaks Around Windows and Doors Before You Seal Them

Find the leak before choosing the fix: use a visual inspection, the paper test on moving joints, and a daylight check to confirm whether the draft is a real air leak or just a cold-surface sensation, then match weatherstripping or caulk to the joint you actually found.
A draft near a window or exterior door is easy to notice. What’s harder is deciding what the draft actually means: sometimes the moving part of the window or door isn’t sealing well, sometimes there’s a gap between the frame and the surrounding wall, and sometimes the air you feel isn’t a direct leak at all, but cool air moving across a cold surface.
And sometimes the biggest air leaks in the house are somewhere else entirely. ENERGY STAR’s own project guidance notes that doors, windows, and walls tend to be the more accessible DIY areas, but often have less impact on total energy use than major attic and basement leakage.
That makes the first job simple: find the leak before choosing the fix.
The short answer
For an accessible window or exterior door, start with three checks:
- Look for visible gaps, damaged seals, or daylight where the unit should close tightly.
- Use a paper test on the operable edge. ENERGY STAR recommends closing the window or door on a piece of paper. If the paper pulls out easily without tearing, the seal may be loose enough to leak air.
- Pay attention to where the draft occurs. A leak at a moving sash or door edge suggests a different repair from a gap behind trim or between the frame and wall.
Weatherstripping is generally used on components that move, such as operable windows and doors. Caulk or another appropriate sealant is generally used for cracks and gaps between stationary components. If the leak is behind trim, inside a wall assembly, in an attic or crawlspace, around combustion equipment, or otherwise difficult to verify safely, the project may be better suited to a home-energy or qualified building professional.
Don’t replace a window simply because you feel a draft until you understand where the air is actually entering.
A Draft Is Evidence, Not a Diagnosis
Air movement near a window can come from more than one cause. A true air leak means outside air is moving through a gap in the building envelope. But a cold window surface can also cool nearby indoor air, and that cooled air can fall and create a sensation that feels like a draft even when there’s no obvious opening.
The practical difference matters because sealing the wrong location may do nothing. Before buying caulk, weatherstripping, plastic film, or a new window, try to identify the path. The cheapest successful repair is usually the one that matches the actual problem.
Start With a Visual Inspection
ENERGY STAR recommends beginning with a visual inspection for gaps and cracks. For windows and doors, look at the edge where the moving sash or door meets the frame, existing weatherstripping, the bottom of an exterior door, corners where seals meet, trim around the unit, visible gaps between trim and wall, cracked or missing caulk at stationary joints, and places where daylight is visible around a closed unit.
Also check whether the window or door closes fully. A latch that doesn’t pull the sash into position, a door that’s misaligned, or damaged weatherstripping can create an air path even when the surrounding frame is well sealed. Don’t force a window or door to compensate for a problem in the frame or hardware.
Use the Paper Test on Moving Joints
ENERGY STAR describes a simple DIY paper test for windows and doors: close the window or door on a piece of paper. If the paper can be pulled out easily without tearing, the seal may not be tight enough at that location. Move the paper to several points around the perimeter. A door can seal well at the top and leak near the bottom, and a window can have one corner that doesn’t compress the weatherstripping properly.
The paper test is useful because it helps distinguish a moving-joint problem from a gap in a stationary joint. It doesn’t measure an exact leakage rate, and it doesn’t tell you how much energy the leak is costing. It tells you where to look more closely.
Daylight Is Another Simple Clue
ENERGY STAR also recommends a light test for accessible gaps. If you can see daylight around the edge of a closed exterior door or operable window where there should be a seal, there’s a visible opening. At night, a partner can also shine a flashlight across suspected gaps while the other person observes from the opposite side, where safe and practical.
Don’t use this as a reason to enter unsafe attics, crawlspaces, roofs, or other difficult locations. For windows and doors, the goal is simply to confirm an accessible opening.
Weatherstripping and Caulk Do Different Jobs
Homeowners often treat caulk and weatherstripping as interchangeable. They’re not. Official air-sealing guidance distinguishes them by movement:
Weatherstripping is used where components move, such as the edge of an operable window or exterior door.
Caulk or another appropriate sealant is generally used at stationary cracks and joints.
That distinction prevents a common mistake: sealing a moving joint with a material that prevents normal operation, or putting weatherstripping over a stationary gap that should have been sealed differently. The product still has to match the specific material, gap, exposure, and manufacturer instructions. If you’re unsure what joint you’re looking at, identify the joint before choosing a product.
Don’t Assume the Glass or Window Unit Is the Leak
A draft at a window doesn’t automatically mean the window itself needs replacement. The leak may be at the sash weatherstripping, under or around the sill, behind interior trim, between the window frame and rough opening, through nearby wall penetrations, or from another part of the room.
ENERGY STAR specifically describes sealing behind window and door trim as a separate project from ordinary weatherstripping. That project can involve removing trim and working in the rough opening, and ENERGY STAR rates it as a moderate-to-difficult DIY project. If the unit operates normally and the leak appears to be behind the trim rather than at the moving sash, don’t keep adding weatherstripping to the sash. You’re probably addressing the wrong joint.
Window and Door Drafts May Not Be Your Biggest Air-Leak Problem
Windows and doors are easy to notice because you live next to them. But some of the most significant air leaks in many homes are hidden in attics and basements, and ENERGY STAR’s own project guidance notes that doors, windows, and walls are generally more accessible DIY areas but often have less impact on total energy use than major attic and basement leakage. That’s part of why checking how much attic insulation you actually have is worth doing alongside window and door sealing rather than instead of it. The two problems often show up in the same house.
That changes how you should think about the project. Fix a clear window or door leak because it affects comfort and wastes conditioned air, but don’t assume that replacing every window is automatically the best energy project for the house. If the home has persistent comfort problems, unusually high heating or cooling use, or many suspected hidden leaks, a professional home-energy assessment can give you a better whole-house picture. And if the discomfort is really concentrated in one room rather than spread evenly, why one room runs hotter or colder than the rest walks through the airflow and envelope checks that apply specifically to that kind of pattern, rather than a general house-wide draft.
This kind of air sealing is one part of a broader energy and comfort approach to the house, alongside routine equipment maintenance like how often to change your HVAC filter, since a drafty house and a neglected filter can both masquerade as “the HVAC system just isn’t keeping up.”
When a Professional Energy Assessment Helps
A professional home-energy evaluation is a way to identify where a home is actually losing energy. An assessment may use tools such as blower-door testing, infrared imaging, pressure diagnostics, and visual inspection of hidden or less accessible areas. Those tools can help separate a local draft from a larger building-envelope problem.
That’s especially useful when several rooms are uncomfortable, drafts are widespread, you can’t find a visible source, the attic or basement is likely to be involved, you’re considering expensive window replacement, or you want to prioritize upgrades by impact rather than appearance. The purpose of an assessment isn’t to make a small repair complicated. It’s to avoid spending heavily on the wrong repair.
What About Smoke Tests?
ENERGY STAR describes a DIY smoke test for locating air leaks, but its procedure includes an important safety condition: combustion appliances such as gas-burning furnaces and water heaters must be turned off before depressurizing the house with exhaust fans. A related U.S. Department of Energy air-sealing checklist similarly requires a combustion safety test before and after air sealing whenever atmospheric-vented combustion equipment is present, to confirm there’s no back-drafting.
That crosses into a more complicated whole-house test than most homeowners need for a simple window or door draft. For this guide, the safer homeowner sequence is a visual check, then the paper test, then the daylight or light check, then a professional assessment if the source remains unclear. If you want to perform a full depressurization or smoke test, follow current ENERGY STAR instructions exactly and don’t improvise around fuel-burning equipment.
A Window or Door Air-Leak Decision Table
| What you find | What it suggests | What to do next |
|---|---|---|
| Paper pulls out easily at one moving edge | Weatherstripping may not be compressing properly | Inspect the seal and unit alignment |
| Daylight is visible around a closed door or window | There’s an obvious opening | Identify whether it’s a moving or stationary joint |
| Weatherstripping is torn, flattened, or missing | Moving-joint seal is degraded | Replace with a compatible product |
| Crack is in a stationary joint | Air sealing may require caulk or another appropriate sealant | Match the sealant to the joint and material |
| Draft appears to come from behind trim | Rough-opening leakage is possible | Consider a more advanced sealing project or professional help |
| Window is cold but no opening is found | Surface temperature may be contributing to the draft sensation | Don’t assume air leakage without more evidence |
| Drafts occur throughout the home | Problem may extend beyond windows and doors | Consider a home-energy assessment |
| Window or door doesn’t close or latch correctly | Mechanical or alignment problem may be involved | Correct the operation before adding seals |
| Moisture or rot is present around the frame | Problem is no longer just air leakage | Investigate the moisture source before sealing over it |
Don’t Seal Over a Moisture Problem
Air leakage and water intrusion can occur in the same area, but they aren’t the same problem. If you see staining, swollen trim, peeling paint, soft wood, active water, recurring dampness, or mold-like growth, don’t simply seal the visible gap and assume the job is finished.
The moisture source needs to be understood first: sealing a joint can change drying behavior, and a wet assembly may need repair rather than cosmetic caulk. This site’s own condensation or a possible leak guide uses the same principle: identify the source before covering the symptom.
Make Small Repairs Verifiable
A good low-risk DIY project has a clear before-and-after check. For an air leak, that may mean the paper test was loose before and firm afterward, the visible daylight gap is gone, the door still opens, closes, and latches normally, the weatherstripping compresses evenly, and the draft is no longer noticeable under similar conditions.
If you can’t verify that the repair changed the leak path, don’t keep adding material. Reassess the source.
Build Air Leakage Into Your Home Baseline
For a first-time homeowner, the best time to map drafts is before you start replacing components. Walk the home during a heating or cooling season and record recurring draft locations, windows or doors that don’t close correctly, damaged weatherstripping, visible stationary gaps, condensation patterns, rooms that are consistently uncomfortable, and areas where moisture is also present.
Photographs help, and so does noting the outdoor weather when the problem occurs. A draft that appears only during strong wind tells you something different from a comfort problem that exists every day. Folding this into your broader first-time homeowner maintenance checklist makes it easier to notice when something has changed.
Find First, Seal Second
Air sealing can be one of the more accessible home-efficiency improvements, but the useful sequence isn’t “feel cold air, buy caulk.” It’s:
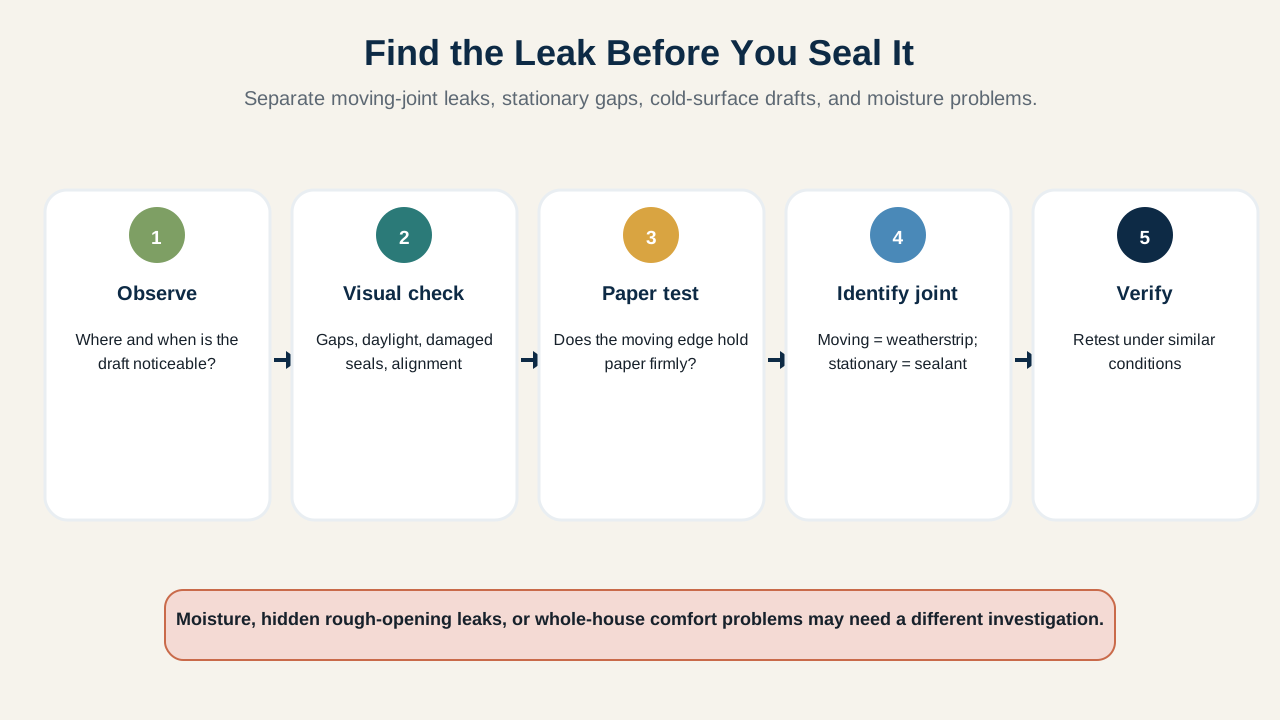
Observe → locate → identify the joint → match the fix → verify
That sequence helps you avoid unnecessary window replacement, the wrong sealant, and repairs that hide a moisture problem. If the leak remains hidden, widespread, or tied to the attic, basement, combustion equipment, or building structure, a home-energy or qualified building professional (see our DIY or hire a professional guide) can take the investigation farther.
A small draft can be simple. The important part is proving that the repair matches the leak. And if drafts, uneven temperatures, and high bills are all happening at once, when to get a home energy audit explains when it’s worth stepping back from one-leak-at-a-time chasing and having the whole house diagnosed.
Sources and further reading
We prioritize primary and authoritative sources. The sources below support the factual and technical guidance used in this article.
Practical Homeownership provides general educational guidance. Home conditions, local rules, manufacturer requirements, and the appropriate professional scope can vary.